
***This tote bag has been updated to reflect changes in the original shape, size and attachment of the handles. The construction of the bag is similar but the new tote has a slightly different look, size. shape and handle attachment.


So a few months ago I made this bag for a blog conference.I also made these adorable bags for my roommates.
Each one was a little different and personalized. My roomies loved them and I got several compliments on them. I was asked several times where I got them. My answer "Umm I made them" . Next question do you sell them and do you have a tutorial? The answer, yes I make them no I do not have a tutorial. Well Blog readers today I have a tutorial. This bag takes a bout 1-2 hours and looks great any time of year. I love to take it to the park, the beach or just shopping with a friend. It fits everything you need for a fun day getaway! I love that I can make a new one with beautiful fabric to match anything. And today you can make one too! I added an inside pocket for a cell phone too.

Craft Blog Branding

Snap Conference Roommates
Each one was a little different and personalized. My roomies loved them and I got several compliments on them. I was asked several times where I got them. My answer "Umm I made them". Next question do you sell them and do you have a tutorial? The answer, yes I make them no I do not have a tutorial. Well Blog readers today I have a tutorial. This bag takes a bout 1-2 hours and looks great any time of year. I love to take it to the park, the beach or just shopping with a friend. I love that I can make a new one with beautiful fabric to match anything.
Here is what you need:
1/2 yard of your favorite fabric
1/2 yard of your second coordinating favorite fabric
1/2 yard canvas fabric or lining depending on the durability you want.
1/4 yard fabric for your pockets
Coordinating thread
4 "D" Rings 1 inch size or bigger I like 1.5 inch "D" Rings
Free Tote bag pattern
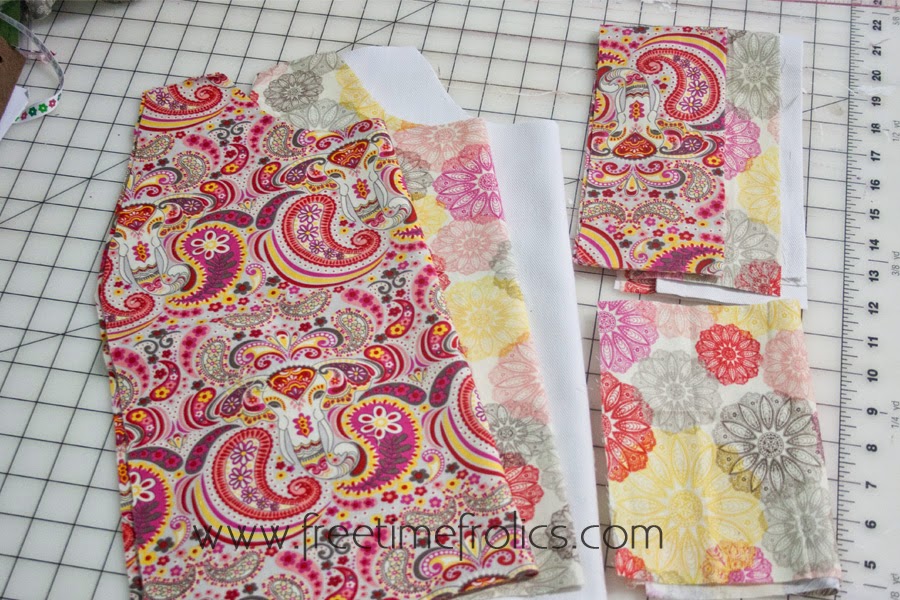
Start by cutting your tote bag pieces. You will cut 2 for the main body, Inside and canvas and straps. Cut 1 strip of inside fabric for the pockets. Cut straps 3 inches by 22 inches. I like my straps a little longer. You may like them shorter. Go with what you love. Pocket will be cut width of bottom of the bag and about 6 inches tall.

For handles place 2 fabrics right sides together. Place canvas on the wrong side of main fabric.
Stitch along one long edge of handles.

Press open and fold over showing both fabrics and canvas in the middle. Fold and press long and short edges as though you are hemming the straps.

Top stitch along all sides of the handles
Sew your ends to a "D" Ring.

Start by hemming your pocket along one long edge. Take your pocket panel and place it on top of one inside panel. Lining up the bottom edges. Pin down. I measure mine into 3rd and place a pin. Then stitch a line down. Securing the fabric and making 3 pockets. You last seams will come when you we the bag together.

For inside fabric place right sides together. Stitch along the 3 sides. Leaving a 3 inch open seam at the bottom.
Repeat last step for the outside of tote. For outside of bag make a sandwich canvas, fabric RS up, fabric WS up then canvas.
Stitch around bottom and sides. from tip corner to top corner.

Turn inside fabric right sides out. Place inside fabric and outer fabric right sides together. Line up edges and pin into place.Stitch all the way around.

Turn bag through opening in the bottom of the inside of the bag.

Press bag, ensuring the insides and outside match up. Begin top stitching around the top handle straps of the tote bag. Stitch the inside opening closed.

Fold the handle, fold ends around a "D" Ring and stitch across. Repeat this step by attaching the opposite end of the D ring and attach the tote bag straps.


I LOVED your guys' bags! They were such the perfect thing! We totally wished we had copied you! This is a great tutorial and giveaway!
ReplyDeletekilee
www.onelittlemomma.com
PS...I think I love the orange and blue floral...and Happy Birthday!
ReplyDeleteKilee
I have to pick?? They are all darling!!
ReplyDeleteI love them all!! The blue, white, orange floral print is gorgeous though. What a sweet giveaway!
ReplyDeleteLoved your bags at SNAP! Love these as well...they are so pretty I Love them all!
ReplyDeleteLOVED those bags at SNAP! How fun! It's hard to pick a favorite, but if I must I love the purple one and the striped one!
ReplyDeleteThey're all amazing but the purple is my favourite. I'm pinning this so I can try and make one.
ReplyDeleteThese are so pretty! I love them all! If I had to pick one I'd choose the green and aqua one or maybe the stripes. It's hard to decide.
ReplyDeleteSo cute! How nice of you to make them for your friends :)
ReplyDeleteI'm visiting you today from Sugar Bee. I co-host a Linky Party Tuesday (open thru Sat) and I'd love for you to link up! I hope you get a chance to stop by, link up and leave a comment, too!
~ Megin of VMG206
Join me each Tuesday for Brag About It Link Up Party
Umm...how do you choose one favorite?!? I adore the paisley, purple, and green floral bags. I'd be thrilled with any of them!
ReplyDeleteI love the pink paisley! I thought you gave the best roommate gifts, looking at the tutorial it seems like it took up a lot of time! Thank you for the giveaway!! xo
ReplyDeleteLove these cute bags!I love the purple with big flowers. What a fun giveaway!
ReplyDeleteRachel @ R & R Workshop
These are to darn cute! Wish that I liked or could sew. Thanks for the giveaway.
ReplyDeleteMarcie @ I Gotta Try That
P.S. Couldn't choose which bag I love the most. Love them all!
ReplyDeletei LOVED your bags at SNAP - - I don't know if I could choose a favorite!
ReplyDeletefrom first glance I super love the striped one but they are all amazing
ReplyDeleteLove them all!! So cute!! Thanks for the awesome giveaway! :)
ReplyDeleteI love my Bag!!! And would love another one friend!! :) I snatch up the one with the blue birds!
ReplyDeleteI really love the blue paisley print, it looks so retro and cute!
ReplyDeleteLove them all! Eeny-meeny-miney-moe: The blue-green flower pattern. Or the purple-y one with the big chrysanthemums...
ReplyDeleteI like the one with the birds the most and a close second is the blue and green flowers :)
ReplyDeleteMy favorite would be either the one with white mums or the stripes. I love them all! :)
ReplyDeleteWant to try and make a bag so bad! But its so intimidating. Love all of them!
ReplyDeleteI love the chevron ones and the stripes so cute! MUST try to make this! :)
ReplyDeleteThanks for linking to Take-A-Look Tuesday over at Sugar Bee Crafts - you were featured today!!
ReplyDelete--Mandy, www.SugarBeeCrafts.com
I love the purple/blue bag with the big white flowers!
ReplyDeleteI love the elephants :)
ReplyDeleteI LOVE the Elephant Mums in purple! SEW pretty!!! Thank you for the pattern & the opportunity to grab one YOU have made. Adore ALL the fabrics you used!
ReplyDeleteI love the birds and flowers! Beautiful!
ReplyDeleteLove the bags! I sure your roommates at the conference were thrilled to have been given a homemade bag from you. So Sweet and Thoughtful. ;o)
ReplyDeleteI think my favorite is the green and blue medallions. Though they are all cute!
ReplyDeletelove them all! i remember chatting with you at SNAP about them! ... and trying to convince you to be my roomie next year lol!
ReplyDeleteAwesome tutorial! I love the birds and flowers style!
ReplyDeleteThese are beautiful! Thanks for the tutorial! The mums...gorgeous! And the green and blue medallions!
ReplyDeleteOh...I am super excited you are sharing your secret to your SNAP bags!! I love them all, but especially the blue medallions and the birds and floral.
ReplyDeleteHappy Birthday!
Ariean
I love the purple bag!!
ReplyDeleteThey are all beautiful but I really love the birds and flowers.
ReplyDeleteI love the green and blue flower bag. These are awesome and I want to make some once I get my sewing machine running again!
ReplyDeleteThe purple and white one :)
ReplyDeleteSo cute! I love the fabric you chose. One of these days I need to break out the sewing machine more and make some tote bags. :)
ReplyDeleteSo cute!
ReplyDeleteI love all of the floral ones!!! Beautiful bags, thanks for the giveaway!!! Question... how do you check your pinterest followers? Last time I did a giveaway I was trying to check my entries and my followers weren't in alphabetical order and I had no idea how to find a single person??? and you have WAY more followers :o)
ReplyDeleteEmily @ Nap-Time Creations
Thanks for visiting. I am not really sure how to check for followers. Usually if they are in a giveaway I can check my feed to see if there name pops up. I wish FB and Pinterest would alphabetize!
DeleteI love them all but I think the paisley print one is my favorite.
ReplyDeleteI love the bags. Who makes the Verona Paisley print and the print that you used inside of that bag??
ReplyDeleteHi CRLacy
DeleteThanks for visiting. The Verona Paisley is maded by Riley Blake Designs. It may be out of print. If you are interested I would be happy to sell you some at my etsy shoppe. Just let me know. For the inside I just a coordinate in the same line.
Adrienne
I would love to buy some!!!! Let meknow what your etsy shop address is.
DeleteI love this! And super thankful for the free pattern. Making one today. I'll post a pic. thanks again! :)
ReplyDeleteThis looks exactly like the Amy Butler Nappy bag pattern! Its a great look.
ReplyDeleteIs there canvas in the pocket too? I am making one per your instructions but the pocket material looks like there is something behind it. Thanks so much.
ReplyDelete