Web Toolbar by Wibiya Free Time Frolics: 4th of July
Showing posts with label 4th of July. Show all posts

Wednesday, June 19, 2013

What to wear!! {Fourth of July} 15+ Diy Clothing Projects

The 4th of July is one of those holiday I just love dressing up for.  I realize that it is only 1 day, but I grew up being taught that it is important to celebrate our freedoms.  I have heard stories about family members who have fought in past wars.  Hearing there stories reminds me that freedom is not free.  It is earned and should be appreciated. So every year I rack my brain to find something unique to dress my kids in. So this year I made a round up of projects that I love. Some are DIY some are purchase but all are fabulous.   All around dressing You and your kids for the 4th of July!! 


Monday, June 17, 2013

Easy American Flag T- Shirt


Sugar Bee Crafts Red White Blue

I am so excited to be a part of Sugar Bee Crafts Red White and Blue Series.  Today I am sharing my Easy American Flag T-Shirt. No sew, not cutter required!!

I love dressing my kids in Patriotic clothing and outfits for the 4th of July.  I think it is important to instill in our kids how important our freedom is, and to appreciate those how fight for our freedoms. So every year I try to think of something easy and special for each one of them.  This year I went the easy route and made these fun and easy American Flag Tees!!

Friday, June 7, 2013

Patriotic Pinwheel Hair clip or pin


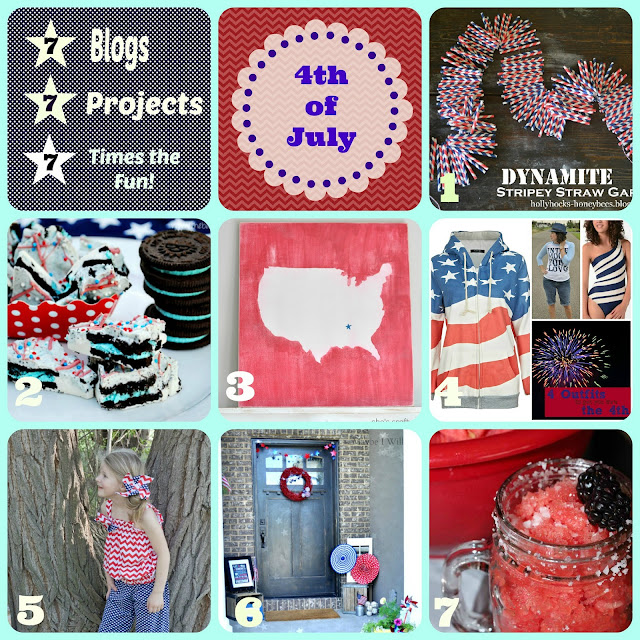
Today is so exciting!  I have teamed up with some of my favorite bloggy friends to bring you:
7 Blogs
7 Projects 
and
7 Times the Fun
All centered around the 4th of July!

Not sure what to bring to that BBQ?  Want that perfect red, white and blue decoration?  How about what to wear?  We have got you covered!

So please sit back, relax(I'm grabbing some swedish fish and red cream soda), and enjoy these 7 fabulous projects!


1. Melissa of Hollyhocks & Honeybees

2. Emily of The Benson Street 

3. Candice of She's Crafty

4. Ashley of flats to flip flops

5. Adrienne of Free Time Frolics

6. Andie of Maybe I Will 

7. Kaylynn of Among the Young 


I am always looking for an amazing hair do-dad for the Little Miss.  I like unique items that no one else will have.  It's important to me.  I live in a small city with few choices. So everyone has the same stuff. So I come up with my own variety! So today I am sharing my quick and easy Patriotic Hair Pinwheels! These beauties are easy to make and require no sewing.  Just a little ironing and glue.

Monday, July 2, 2012

Firecracker Table Decor

Firecrackers are always a great way to decorate for the 4th.  Here is a fun tutorial to use for your table scape or mantel.


Thursday, June 21, 2012

Patriotic Pinwheels {Washi} style

I have been racking my brain at what I wanted to do for my 4th of July Mantel.  I have had a few things in mind but it needed some finishing touches. I was blog hoping the other day and found 52 Mantels.  I saw Emily's all paper mantel and loved her flowers on the wall.  It totally gave me the idea why not use pinwheels. So I started looking for paper.  When I couldn't find what I wanted I thought "I have all this washi tape.  What if I ..." and there it was. Just what I needed to finish my Mantel.  Washi Tape Pinwheels. So here you go.


Wednesday, June 20, 2012

4th of July Mantel

4th of July Mantel


Its time again for a new Mantel.  I started a summer mantel but didn't get it finished. So I figured I would do my 4th of July Mantel and use it for most of the summer. Here are a few features on my Mantel. I decided to go with an Uncle Sam Kind of theme.

Uncle Sam print.  I used the tutorial (Here) to make the print.  My Uncle Sam is 11x14. The little Uncle Sam hat was made from a pattern from The Quilted Fish.  (Here) The Small Fire crackers tutorial is Here.
Simple striped bunting with felt star. I have them stuck to the shelf with poster putty.

Washi Tape Pin wheels. Who needs fancy paper when you have washi and plain paper. 


 I used my 4th of July Printable here for the framed subway art.
So there it is my 4th of July Mantel.  It looks amazing on my shelf.  So fun and Patriotic.  Come back tomorrow or a Tutorial on the Washi Tape Pinwheels.  They are super easy and fun to make in with the kids in your Free Time.  Thanks for visiting.

52 Mantels

Wednesday, June 13, 2012

4th of July Threads +Quilted Fish Giveaway


Its that time of year for a new outfit for the holiday.  This year is an Uncle Sam theme.  (I am using it for my Mantel too.
Wrist corsage in just the right colors.

A skirt {of course} Broad Stripes  & Bright Stars


Tuxedo styled shirt


And a Top Hat just like Uncle Sam.
I love how her outfit turned out.  And she loves it too.  Now she is ready to sport her new threads at any holiday party! 
Do you like her hat??? Want to make one of your own???
 I contacted Amanda at  The Quilted Fish. She is the designer of  "We're all Mad Here"  the pattern I used to make this hat. She designs beautiful fabric for Riley Blake and Patterns.   I found the pattern and had to have it.  It is so versatile and could be used for a bunch of holidays.  It;s going to be adorable on my mantel too.  How are you dressing your kiddos for the holidays?


Wednesday, June 29, 2011

4th of July Graphic Tees with my Silhouette


I saw the Silhoutte on a blog last summer.  I just had to have one.  It has sat for a while in a closet.  Pregnancy, Baby, Kids.  They suck up my time.  But I finally started to use it and I love it!!!!! I have had this project on my mind for a while and finally got it done.  I had a deadline but I got done early so I am here to share! 4th of July shirts.  My older boys picked the same one. So I only Photographed one of them. Here they are:


For the big boys


The Little Miss

And last but not least the Little Man


 I can't wait for the to wear them!  They are equally excited.


I used a template from the Silhoutte America store and the font is Oh Shoot!
If you love to craft this is definitely for you.  It cuts heat transfer, fabric, paper, magnet paper, and tattoo

paper and so much more.  I learn something new every time I use it! If you are interested watch crafty blogs for Promos.  They do them alot.


Check back for my other Silhoutte projects.

Monday, June 6, 2011

Firecrackers!

I am not really huge on decorating my house for holidays.  Between 4 kids, keeping house and my love of sewing, decorating for the holidays is pretty low on my list.  I have decide to have a sofa table in my entry that I can decorate for the holidays and call it good.  Then I can have a few decorations for holidays to feel festive and not to much to store the rest of the year.
I have had this idea in my head for a while and finally saw what I need to make it happen at Michaels. Wahoo!!!
So here is version #1
Ribbon Style

Let's start with a supply list:
Paper pencil cups
(These come in a package of 6 by Creatology at Michaels)
2 inch ribbon (1 yard will make at least 3 firecrackers)
1/2 inch ribbon (1 yard)
3/4 inch or 1 inch ribbon (1/2 yard)
Wilton cupcake picks ( I got mine at Michaels in the patriotic holiday section)
A crafty girl's best friend = Glue Gun
Optional blue or red spray paint


Start by punching a hole in the center of your pencil cup.
I am a little old school.  I still have my Making Memories punch kit. Similar to this one.  I still use the eyelet setter and hammer to make my holes.  It works great.  If you don't have a similar item I was thinking you could use a toothpick or bbq skewer to punch your hole.
Here is the step I missed.  If you would like to paint your cups, paint them now. Just give them a light coat around and a second coat on the top.
Find the center of the cup and place a small line of glue starting at the center and going 2 inches to the edge.


Start with a small line of glue in the center and move to the edges of the container.  Lay edge of ribbon on glue and wrap around container.  Place small line of glue on top or first edge and glue down. Repeat for second piece of ribbon.   
Repeat last step for blue ribbons around edges.

This is what it will look like.

Add your cupcake picks and stick them into the holes you punched in the beginning.

Wrap your last ribbon around your firecracker ans VOILA your done.  Super easy your kiddos could do it!!
I added my 4th of July free Printable and I have the beginning of my holiday decoration!
Version #2
Glitter style

Supplies:
Pencil cups
Red or Blue glitter
Spray Glue
Wilton cupcake picks


1-Punch Hole in cup
2- Spray glue on cup
3- Sprinkle glitter on cup.  All over.

4- Let dry
5- Add Pick
6- Wrap with ribbon

All finished.  I can't decide which on I like more. I love fireworks.  Our first summer in Idaho Falls were eventful. But one memory I have is the Fireworks.  Melaluca, a local company put on an amazing fireworks show.  You can see them from miles around and they shoot them off from the a spot around the falls of the Snake River.  It is awesome. I can't wait to see the show this year!

 I hope you all have a safe and fantastic holiday!!


Linking up too:
Night Owl Crafting
http://733blog.blogspot.com/
I Heart Naptime
Tatertots and Jello
Bacon with the Hungry Hypo
Spunky Junky
Funky Junky Interiors
Visit thecsiproject.com
Related Posts Plugin for WordPress, Blogger...